Thursday 12 December 2013

Mastering Macaroons

So I have had a few weeks off from blogging which have mainly been taken up with mastering french macaroons. Although they are notoriously finickety I decided to give them a go (and also rather naively to sell them for the big pink bake off!). The internet is full of loads of conflicting information about how to make macaroons, I've made about 150 in the last month so here is my tried and tested way. 

To make 8 medium macaroon shells you will need: 
50g ground almonds 
140g icing sugar
2 large egg whites
1 tbsp caster sugar
1 or 2 drops of food colouring paste (in your desired colour)

you will also need:
baking parchment, vinegar, baking tray, hand whisk and piping bag (and a lot of patience!) 

There are two key things to getting macaroons right, firstly don't try to cut corners (I normally guess with measurements but you have to be really accurate with these) and get everything prepared before you start making them. 

Begin the day before you want to make your macaroons by separating your eggs and keeping the whites in a clean container outside the fridge. If you forget to do this you can blast your egg whites in the microwave for 5 minutes but it is better to be prepared. The egg whites must be at room temperature for the macaroons to work so bring them out of the fridge a few hours early. 

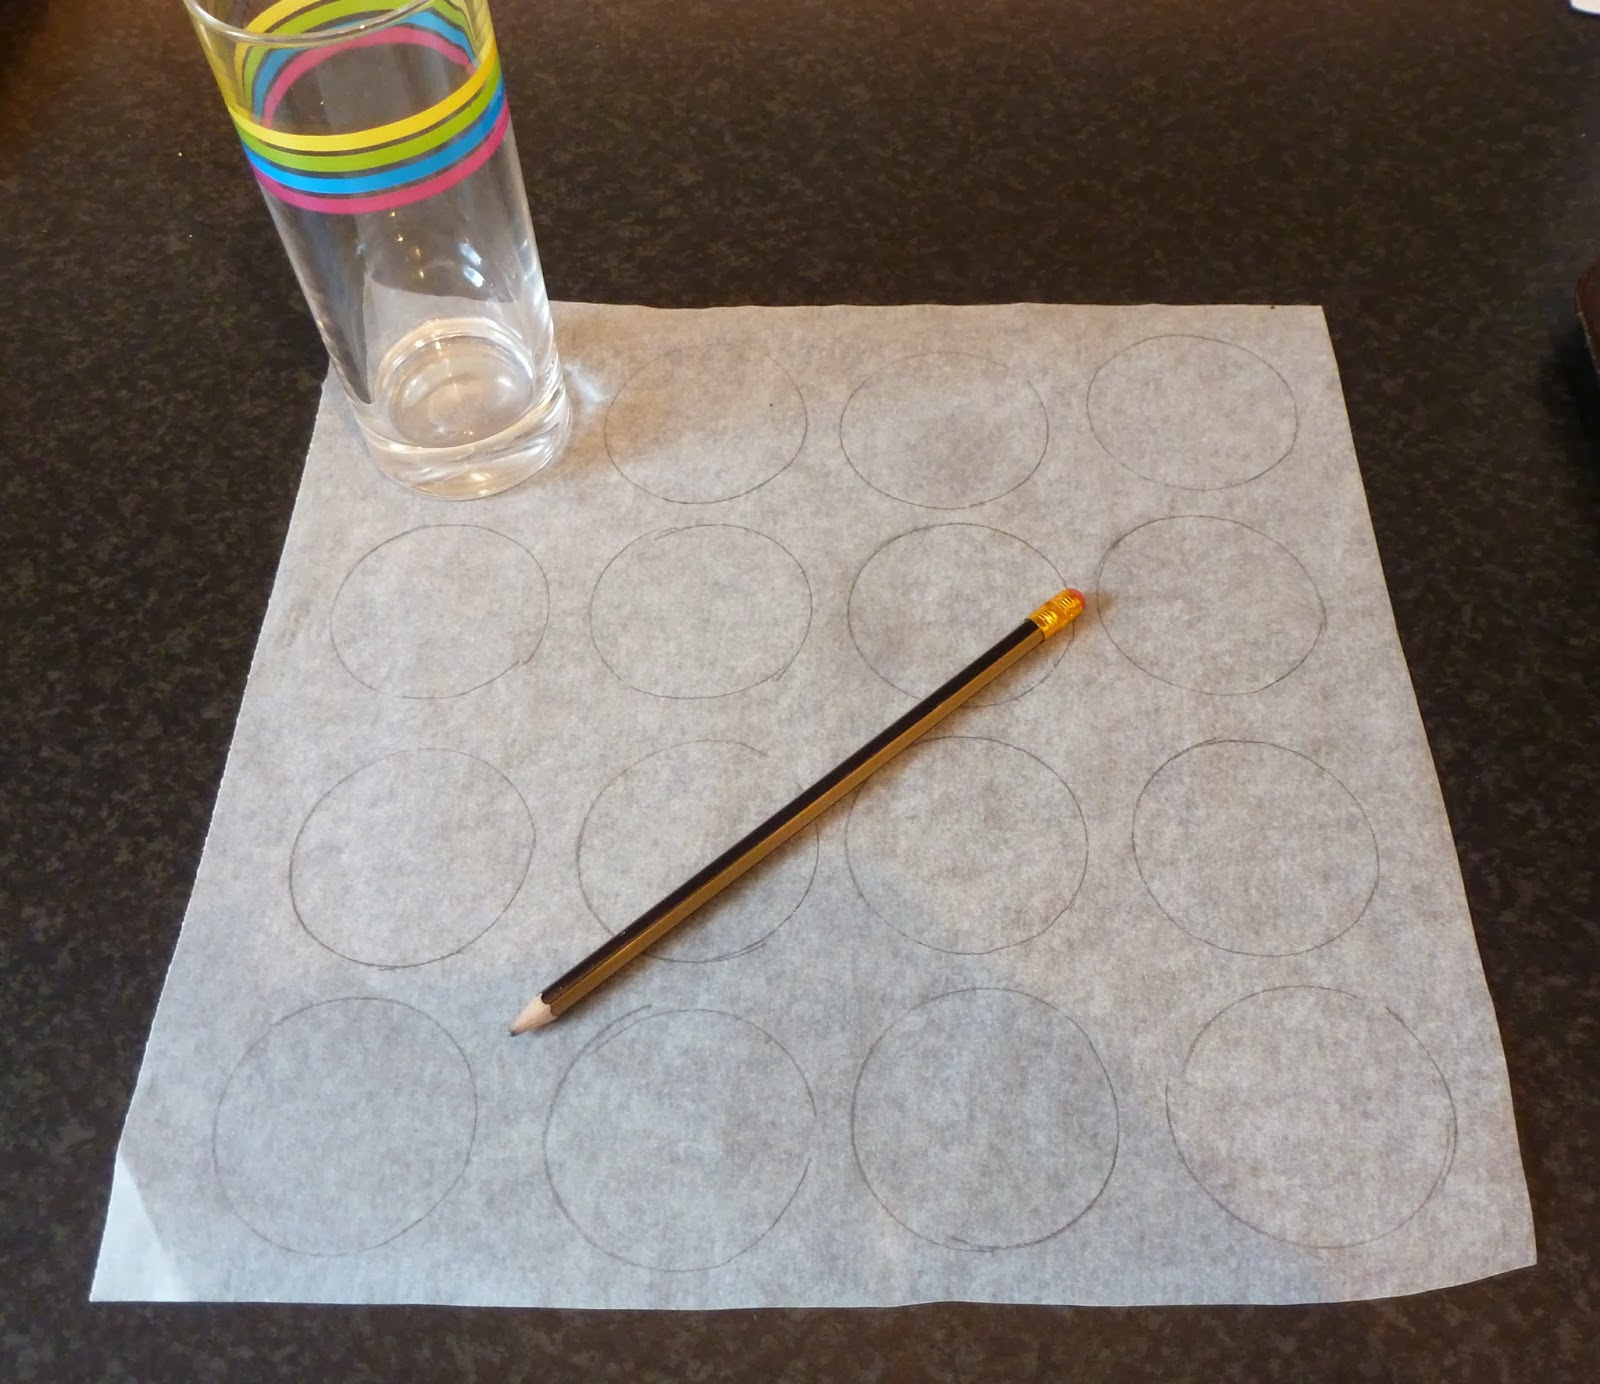
I also prepare my baking paper in advance by drawing 16 circles on a sheet so that my macaroons come out same size (I drew round the bottom of a glass). You can print off a macaroon template but I think you can squeeze more onto a sheet if you draw them yourself - they don't spread whilst baking. 


Next you need to sieve and weigh your ground almonds and icing sugar (normally I wouldn't bother sieving but if you want a good consistency this is a must). I also dip a kitchen towel in a little vinegar and run it over all the equipment that I use as any grease at all will ruin the mixture. It is a good idea to have your piping bag set up and ready before beginning, I find a large circular tip is good (wilton 1A). Twist the end of the piping bag to prevent mixture spilling straight out and also stand the bag in measuring jug so you can easily put the mixture in. 


Now you are ready to begin whisking your egg whites, using an electric whisk on the high setting whisk until the egg whites become bubbly and you begin to see the whisk leaving a trace. Gradually add the tablespoon of accurately measured caster sugar over the next few minutes of whisking. Continue whisking until the egg whites are stiff enough to hold peaks when you lift the whisk out, the  egg whites will look creamy and dense with no bubbles at all. Compare you mixture throughout your whisking to this learn to make macaroons in 5 minutes video to see if it is correct. My general advise is that at this stage it is better to overwhisk than underwhisk. 


Now it is time to very gently fold in the dry ingredients and food colouring in, this is another stage where is is good to watch the learn to make macaroon video clip to get the correct consistency. If you undermix the ingredients then your shells will crack and if you overmix then they will go flat (I think overmixing is the better option!). Once you mixture is complete and the colour is uniform then carefully transfer it into your piping bag. While holding your piping bag vertical pipe straight down until the mixture has filled the circle and then pull up.


Once you have finished piping bang the baking tray on the counter a few times to bring the air bubbles to the surface. Now the macaroons need to be left to rest for about 30-40 minutes (as tempting as it is don't skip this step). You will know they are ready to go in the oven when you can gently touch the top of the shells with no mixture coming off on your finger. Preheat the oven to 180°c and cook your macaroons for ten minutes. If you are really struggling to get them off the greaseproof paper when they come out then give them another minute or two in the oven. 


Hopefully you will end up with macaroon shells that have the illusive foot. Then all you have to do is wait for them to cool, fill them with some delicious strawberry buttercream and try and restrain yourself from eating them all in one sitting. 

Happy baking xxx

Friday 11 October 2013

Spicy Autumnal Banana Bread

One of my lovely housemates had a few bananas that had gone a bit squishy so we decided to make some beautiful banana bread with a bit of an autumnal twist. I don't think there is a time of day when I would not like to eat banana bread, I love it for breakfast! Our banana bread only lasted a few days because we ate it so fast. This particular one is very moist and because of all the delicious spices tastes very autumnal. This recipe uses fruit that is past its best and lots of store cupboard essentials so is cheap, easy and delicious.

To make your own lovely banana bread you will need:

2 very ripe bananas
170g butter
170g sugar
 3 egg
170g self raising flour
60 ml milk 
1 teaspoon ground ginger
1 teaspoon all spice
1 teaspoon cinnamon 
1 teaspoon runny honey
A few drops of vanilla essence

A greased and lined 2lb loaf tin

Begin by preheating your oven to 160 degrees c. 

Next melt the butter, sugar and vanilla essence together in a saucepan, don't let the mixture boil instead just allow it to gradually melt:


While the butter is melting add mix all the dry ingredients (flour, spices) together and then add the eggs and the milk. Allow the butter mixture to cool slightly (you don't want scrambled eggs in your mixture!) and then mix it into the other ingredients. Pour the mixture into your lined tin and bake for 50 minutes to an hour. I had the same issues with silicone tins that I did with my blackberry and chocolate cake so mine took a tad longer. Check that your bread is done by inserting a skewer into the center and checking that it is clean when you pull it out. 

Then you are finished, enjoy it hot or cold and at any time of day.


Happy Baking xxxx

Friday 4 October 2013

Blackberry and Chocolate Cake

There are very few fruits that say autumn as much as some beautiful blackberries and whilst I was cycling last week I got the amazing thought that blackberries and chocolate would be the perfect combination. I was inspired by this beautiful bundt cake by chasing delicious but sadly I still lack a bundt tin so I decided to go off piste and create my own blackberry cake. It turned out to be really delicious, the sponge is almost browniey in texture and the blackberries turn almost jammy to give the whole cake a bit of a lift. 

To make this delicious autumnal cake you will need:

330g plain flour
460g sugar
112g cocoa powder
240ml yoghurt
110g butter (melted)
1 tablespoon bicarbonate of soda
1 and 1/2 teaspoons baking powder
3 eggs
1 teaspoon vanilla essence
50 ml freshly brewed coffee
100g frozen red fruits (blended til smooth)
150g whole fresh blackberries

1 20cm x 20cm cake tin - greased and linned

Preheat your oven to 170 degrees.

Begin by mixing the dry ingredients (flour, sugar, cocoa, bicarb of soda, baking powder) together in a big bowl (this makes quite a large cake so there will be a lot of mixture). 

Next add the eggs one by one, ensuring that each egg is combined before adding the next. Also add in the yoghurt, blended frozen fruit, vanilla essence, coffee and melted butter. Your mixture should be deliciously smooth and chocolatey and look a bit like this:


Next very gently fold in your blackberries without squashing them and pour all the mixture into your linned tin. I used a silicone tin (which I wouldn't recommend!) and because they do not heat up as much as a metal tin cakes take ages to cook in them. I let my cake cook for about 1 hour and 20 minutes, if you are using a metal tin then begin checking whether the cake is done (by inserting a skewer into the center and checking it is clean when you pull it out) at about 50 minutes. 


Once the cake is baked then turn it out onto a cooling wire and allow to cool completely before cutting into squares. 


If you fancy more autumny bakes they try this sticky ginger traybake and don't forget for the love of baking now has its own twitter account so give it a follow for lots of cakey updates.

Happy baking xxx

Friday 27 September 2013

Sticky Ginger Tray Bake

There is something about Autumn that makes me want to use lots of spices in my baking. This cross between a flapjack and a ginger cake, originally from food magazine, is the perfect recipe with lots of ginger and cinnamon for the change of season. I was desperate to get back to baking after my long travels and this was a great recipe to start with as they are so simple. These cakes get more sticky over time (nom!) so you need to separate the squares with grease proof paper to prevent them from sticking together. 

To make them you will need:

150ml milk
40g black treacle
80g butter
55g plain flour 
1 tbsp of ginger (I really love ginger)
3 tsp of cinnamon
1/2 tsp of bicarbonate of soda
150g granulated sugar
100g porridge oats 

You will also need a 18cm x 28cm tray lined with baking paper. You can use a larger one if you don't have this size (I had to do this) though I think they ginger squares would be better a bit thicker. 

Preheat the oven to 150°c. The actual recipe is super simple, begin by melting the butter with the milk and treacle over a low heat in a saucepan:


Then in a mixing bowl place all the other ingredients. Give the butter mixture time to cool a little and then mix it with the dry ingredients in the bowl. Once all the ingredients are mixed together then spread the mixture evenly in your lined tin and bake for 45 minutes. 


After removing the tray from the oven allow the cake to cool a little before cutting into squares. If you can possibly resist then leave just a few for the following day as they gets stickier and super delicious. 


Happy baking xxx

ps. for the love baking now has its own twitter account (exciting!) give it a follow for make cakey updates.

Friday 20 September 2013

Cardamon and Vanilla Crème Brûlée

Whilst these are not technically a cake or cookie they were so delicious I wanted to share. I made them for my mum's birthday meal and they were another gem from my fave the sainsbury's magazine. The contrast between the crispy caramlised sugar on top with the creamy delicious custard below is amazing. 

To make these you will need:

600ml of double cream
1 vanilla pod
30 cardamon pods
50g sugar (plus extra for the topping)
6 medium egg yolks 

6x150ml ramekins
1 roasting tin 

Begin by preheating the oven to 140°c or gas mark 1. De-seed the vanilla pod and remove the husks from the cardamon pods so only the black seeds remain. Put the cream, vanilla seeds, vanilla pod and cardamon seeds in a pan. Bring the mixture to the boil and then let simmer for five minutes. 


While the cream is simmering whisk the egg yolks and the sugar together for about two minutes until the mixture becomes lighter in colour and texture.


Pour the hot cream mixture on top of the egg and sugar mixture whisking continuously. Then strain the combined mixture through a sieve into a jug. Place the ramekins in the roasting tin and then fill them with the custard mixture. Pour boiling water into roasting tin so that it comes about halfway up the side of the ramkins (very similar to how you would cook a vanilla cheesecake). Very carefully transfer the roasting tin to the oven and bake for 35 minutes until the custards are just set.  Remove the ramekins from the water and allow them to cool for at least two hours or over night. Just before serving sprinkle one teaspoon of sugar over the surface of each custard and caramelise either using a blowtorch or under the grill. 


Happy Baking xxx

Friday 13 September 2013

Fondant flowers

These beautiful flowers are so easy to make and they can make quite a plain cake look lovely. I made them to decorate my mum's birthday cake, she doesn't really like icing, so any decoration had to be easily removable. 

I make my own homemade fondant icing but it can easily be bought online. If you are using your own fondant then begin by colouring it using gel colouring and knead a little tylo powder into the fondant so that it hardens up. After you have prepared the fondant then roll it out so that it is a  few millimeters thick. For each flower you need three different sized petals and four of each size. I used a petal cutter to achieve this but you could easily freestyle or use a cardboard template. 


Next use the round tipped modelling tool to thin out the edge of the petals to make them look more realistic. 


Whilst the petals are still soft begin layering them up. I normally start by making a cross shape for the bottom layer made of the largest petals. Then just add petals where the gaps are until you are happy with your flower. Use edible glue made from tylo powder and water to stick the petals together. If your petals are not keeping their shape then use small balls of kitchen towel to prop them up until they are dry. 


Add a few edible pearls to the center of the flower and then leave them to dry. I found a really good place to leave them is in the holes of a cupcake tray as they then keep a really nice round shape. 


As always, I would love to know what cake you decorated with your flowers and how you got along with making them. I can recommend them with a lemon loaf:


Happy Baking xxx

Friday 6 September 2013

Lemon Loaf Cake

I made this delicious cake for my mum's birthday. She is not a massive sweet fan so I couldn't make a traditional birthday cake with lots of icing like I did for my sister. Lemon cake is one of the few cakes my mum likes and this Raymond Blanc one is fancier than your average lemon loaf (it has double cream and rum in the ingredients!!).

You will need:

5 eggs
300g sugar (caster preferably)
140ml double cream
4 lemons
2 tbsp dark rum
80g butter
240g plain flour
1/2 tsp baking powder
150g icing sugar
3 tbsp apricot jam

You will also need a 26cm x 9cm x 8cm loaf tin lined with grease proof paper. 

Begin by mixing the eggs, sugar, cream, zest of 3 lemons, rum, butter, flour and baking powder together. The mixture should look like this:


Pour the mixture into the lined loaf tin and bake for 55 minutes or until a skewer can be inserted into the center of the cake and come out clean. Turn the cake onto a wire rack to let it cool for 10 minutes before glazing. While the cake is cooling warm the apricot jam up in the microwave. Also mix the juice and zest of a lemon and the icing sugar together in a pan over a low heat. Gently brush the warmed jam over the cake and then brush the lemon/icing mixture over the top. Place the cake on a baking tray and return it to the oven to set the glaze. This should take about 5 minutes and the glaze should become clear. 


As my mum is not a big icing fan I decorated this cake with fondant flowers which could easily be removed. 


Happy Baking xxx